
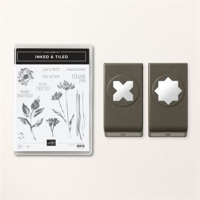
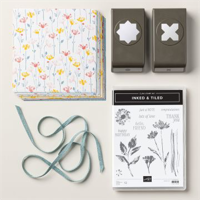
In this blog post, I will explain how I created this delightful gift card holder using the versatile Inked & Tiled bundle from Stampin’ Up. This fun fold design holds a gift card or, in this case, I have inserted a small set of dies that I am gifting to my paper pumpkin subscribers. It’s a beautiful handmade card that your recipient will cherish. Let’s dive into the step-by-step process and bring your creative ideas to life!

The card base dimensions are 5.5″ x 11″and scored at 4.25″ and 8.5″. Fold the top piece down and the bottom piece up and you will have a top folding card with a smaller section at the bottom that folds up and acts as a pocket for the gift card. Use a little tear and tape on each side to secure the edges and create the pocket. Then cut a piece of designer paper 2.25″ x 5.25″ and use this piece to decorate the pocket. The top of the card is decorated with a piece of very vanilla cut to 4″ x 5.25″ and stamped with Lost Lagoon. Ok, now the inside is done…let’s create the front.

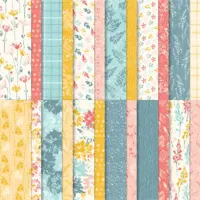
The front of the card comes together so easily – I think the hardest part is deciding which papers to use! I chose to use the paper that coordinates with the bundle, called Inked Botanicals – which, by the way is 15% off right now for the month of June! Using the punches that come in the bundle, punch out three X’s and three stars. Then cut a piece of lost lagoon 2.75″ x 4″ and cut a piece of very vanilla to 4″ x 5.25″.
Next arrange your X’s and stars on the Lost Lagoon piece. I popped up the stars using dimensionals, and glued the X’s down with multipurpose glue.
Stamp out your sentiment on Lost Lagoon and die cut it if you’d like using the stylish shapes banner die – the smallest one. Ink up the very vanilla panel with lost lagoon and the little round star looking stamp that comes in the set. I did this in the upper left corner and bottom right corner.
Tie a small bow with very vanilla bakers twine and glue it down with a glue dot. Add the sentiment just over the top of the bow to cover up the knot.
Finally, use dimensionals to pop up the lost lagoon panel to the very vanilla stamped layer and center it. Glue down the very vanilla panel, voila – you’re done! Please see the full supply list below and shop my online store for any items you might need. Your business is SO appreciated.
Check out my YouTube channel to see the full video tutorial on how to make this card.
Happy Crafting!
Cheryl
Sale: $10.62
Price: $12.50